 Creating a four season room from a porch might not be as hard as you think. There are many benefits to having a four season room, the most important being that you can use it year-round. Porches are great when the weather is mild, but they can become too hot in the summer and too cold in the winter. A four season room is temperature-controlled and can still offer the same views to the outdoors that a porch would. Installing windows will allow for cross-ventilation, and you can even take advantage of the weather when it’s nice.
Much like finishing a basement provides more usable square footage, a four season room can do the same for your house. Maximize your living space year-round by transforming your porch into a four season room. This article will dive into how to do it and the crucial details you need to know about each step of the process.
Reasons For Converting
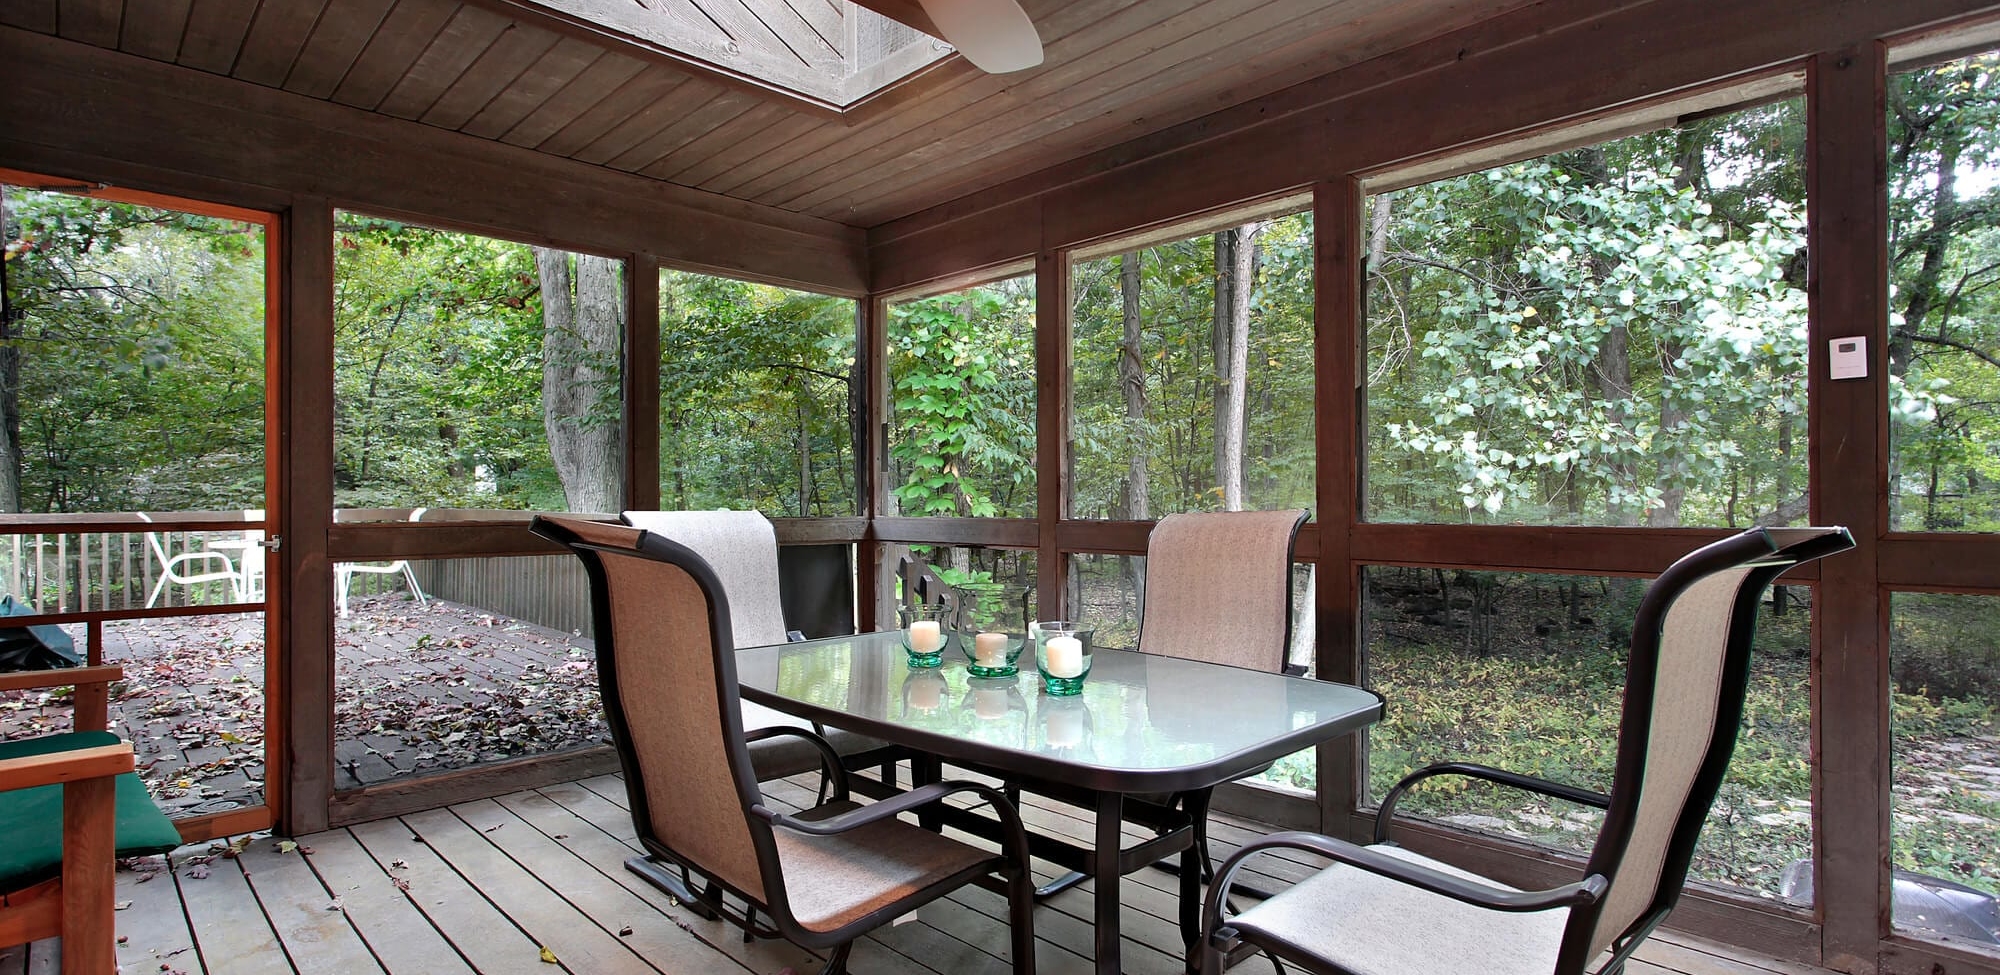
Porches are great, depending on what climate you live in. But if you find yourself barely utilizing the space, it might be time to convert the porch into a four season room. These rooms are sometimes called sunrooms because they make you feel like you’re outside, sitting in the sun. They usually have windows on three of the walls, making it a haven for natural light. You can decorate the room like you would an outdoor entertainment space but still enjoy it year-round. And with today’s movable glass walls, you can open them up during nice weather to walk out onto your deck and create convertible space that can really maximize your square footage and your access to the backyard.
Process
The process of converting a porch into a four season room has many steps, but they are easy to follow. Make sure you use the best materials available and don’t skip out on the insulation, or you will have severe problems in the future. Take measurements beforehand and plan out where you’d like the windows and doors to go.
Deconstruction
- Pry off wood stops that are holding the screen panels in place.
- Once the inside stops are removed, a few taps with a mallet from the outside will free the panels.
- Lift the panels out.
- Remove trim from the posts.
Double Base Plate Construction
- Make a three foot wall out of two by four wood planks.
- Use a pressure treated board on the bottom, then attach a standard two by four to the top of it.
- Drill through the two boards just far enough to make a mark on the stone or whatever surface is below. Then remove the boards and switch to a hammer drill to continue drilling through the stone.
- Drive expansion anchor bolts into the holes in the stone.
- To make it an airtight seal, lay down a strip of foam insulation on top of the stone, then lay the two by fours over the bolts.
- Install washers and nuts once you’ve laid the boards down. Tighten everything with a socket wrench.
- Trim away any excess foam.
- Repeat this same process for all the other wall sections.
Short Walls Construction
- Nail in-studs to the posts.
- Place the top plate (or sill) in place above the posts.
- Check to make sure the top plate is level.
- Install studs every 16 inches or so, making sure they are vertical with a level. Place a nail at the top and a toenail at the bottom.
Creating a Door Opening
- Add two by fours to reduce the rough opening to the right size for your door.
Enclosing the Space
- Apply plywood sheathing on the outside.
- Tilt the sheathing up and slide it into position, then attach it with a clamp.
- Now that your hands are free, place a few nails at the top to hold the plywood sheathing in place.
- Remove the clamp.
- Using a T-square (which you can make from two pieces of wood), draw lines where the studs are located.
- Once the lines are drawn, insert nails up and down along the studs to keep the plywood sheathing held in place.
Creating Water and Air Barriers
Keep rain, snow, and cold winds from penetrating the space. A homewrap can keep water and air out, but will still let water vapor through so that you don’t have any condensation form in the walls and cause damage. Properly insulating your home is very important, because if it’s done incorrectly you could have real costly problems later.
- Unroll the homewrap and cut out sections according to your space.
- Attach to the walls and posts with a staple gun or hammer tacker (the hammer tacker is a faster and easier option, if you have one).
- Make sure you lap upper pieces over the lower ones, so that flowing water will be diverted to the front of the strip below and never behind the wrap, where it could cause rotting.
- Use a knife to trim any excess wrapping.
- Tape all the seams with the corresponding homewrap tape.
Sealing Window and Door Openings
- Use aluminum tape to create a water and weather-tight seal.
- Apply tape to the sills and run it up the sides about eight inches.
- Cut small slits in the tape at the corner so it can wrap around the edges.
- Fold the edges of the tape down to create a seal.
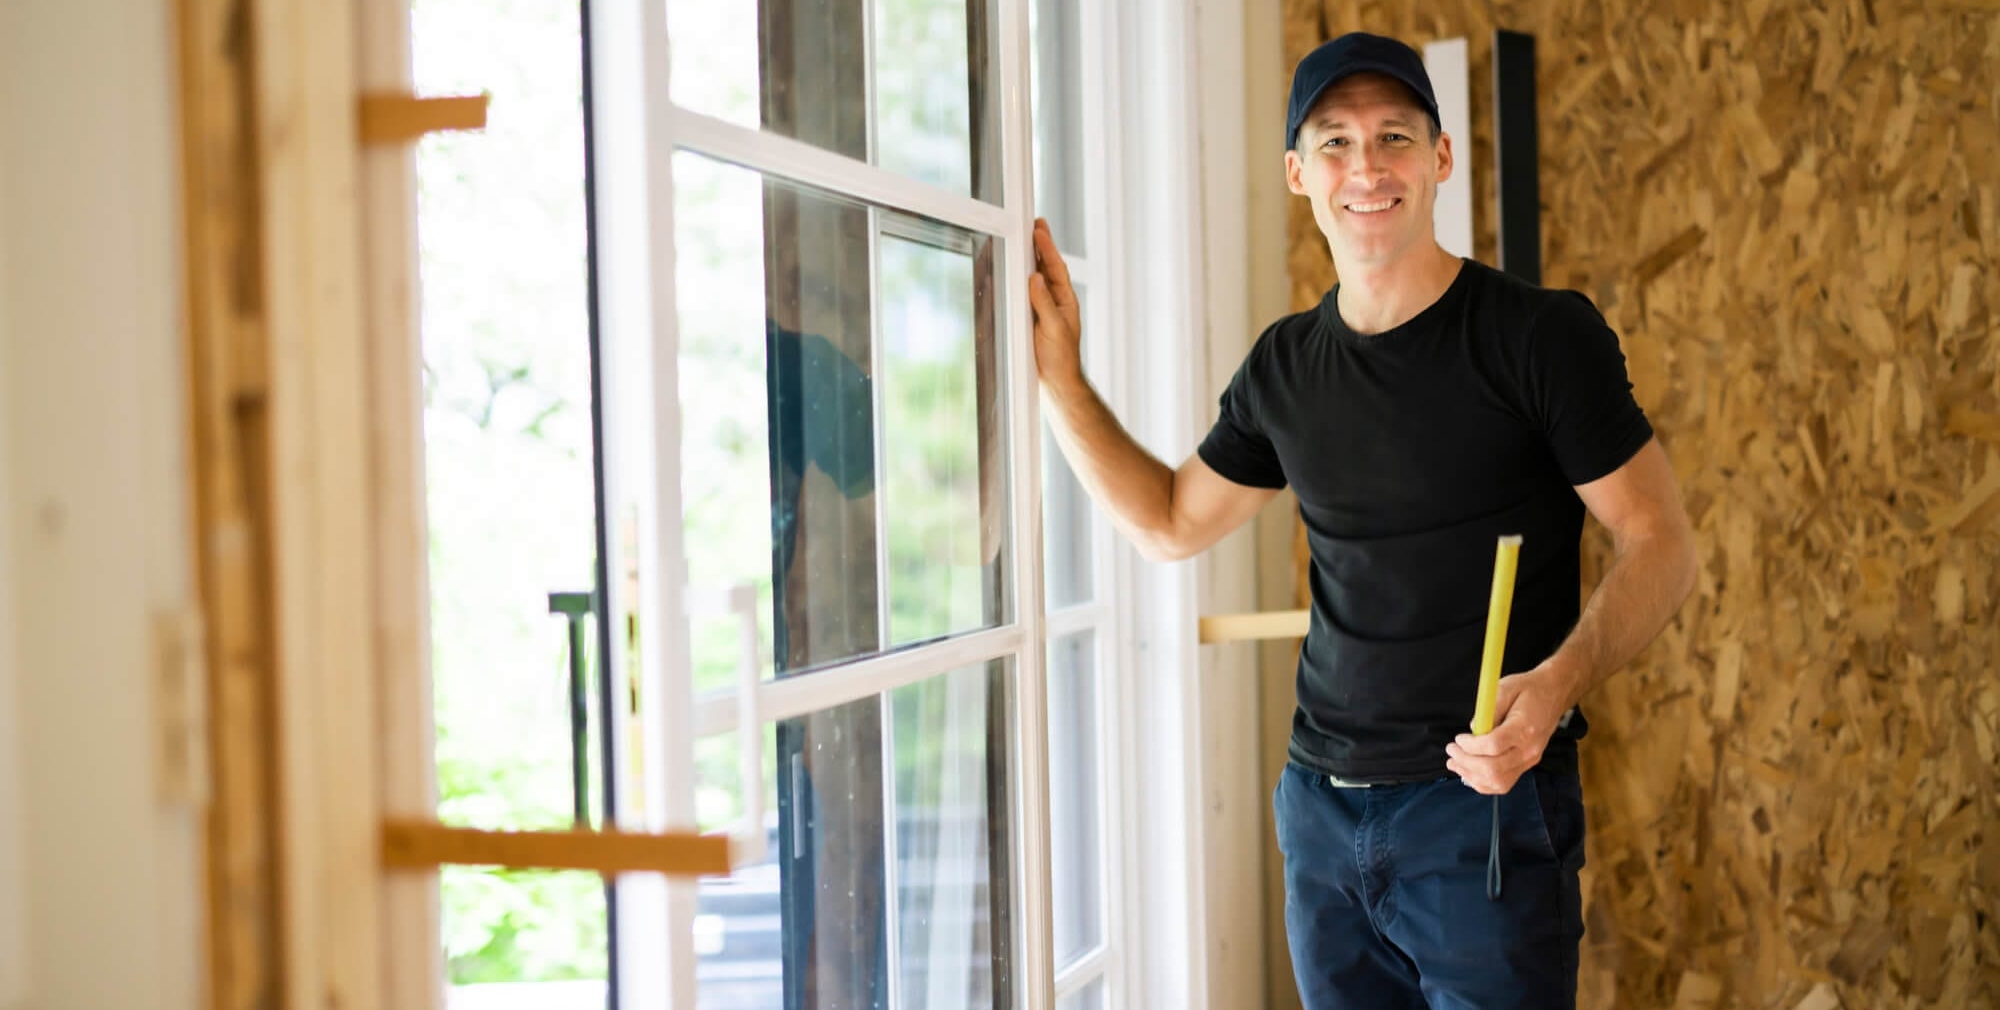
Inserting New Windows and Doors
- Bend metal flange outward and apply caulk to the inside of the flange.
- With two people, lift the window up to place on the bottom of the window opening.
- Tilt the window up into position.
- Make sure the housewrap wraps over the window flange, then nail the window in place.
- Install any doors in the same manner.
Adding Exterior Trim
- Clamp the wood seals below the window frame then secure the screws.
- Overlap adjoining sections with a mitered scarf joint.
- Use flat trim above the windows.
- Add cornice molding for a nice detail where the eves meet the wall.
- Fill in the space between the windows with a flat board.
Shingling
- Tack a strip of one by two in place as a ledge, then set each shingle on the board and tack temporarily in place.
- Once a row is set, strike a chalk line as a nailing guide then permanently attach each shingle with galvanized nails.
- Remove the one by two ledge.
Insulating the Walls
- Cut to fit the insulation to each bay.
- Place the pieces of insulation in the bay, making sure the vapor barrier is facing the interior of the space.
- Then staple the paper of the barrier to the posts.
- Cut out any openings for electrical receptacles (make sure your power is turned off).
Placing Drywall
- Place the drywall and secure with screws.
- Cover the recessed screwheads with joint compound.
- Then apply compound to the joints.
- Wet your paper tape then lay it along the joint, then press it into the compound by keeping your knife at a shallow angle.
- When taping the corners, fold the tape before dipping it in the water.
Trimming Inside Windows
- Secure boards along the interior of the window with nails.
- Place trim and secure into place over the boards.
Benefits of a Four Season Room
If you aren’t confident in your ability to properly convert your porch to a sunroom, then let a contractor you trust do it for you. There are so many benefits to having a four season room. You’ll be able to use the extra square footage all year round, no matter what the weather is. Sunrooms are especially nice in the winter when it’s too cold to go outside. The process of converting your porch is pretty straightforward and will result in a great new space in your home.